Glass slumping is an exciting and versatile art form that allows artists to create unique, three-dimensional objects by heating and bending glass over a mould. This process can produce stunning results when executed with skill and precision.
This ultimate guide to glass slumping offers expert tips and techniques for creating beautiful artistic pieces that you'll be proud to display in your home or gift to friends and family.
The art of glass slumping has been around for centuries, with its origins traced back to ancient Egypt and Rome. It has gained popularity in recent years as artists and hobbyists alike have discovered the endless possibilities that this medium offers.
Whether you're a beginner just starting out in the world of glass art, or an experienced artist looking to expand your skills, this comprehensive guide will provide you with the knowledge and helpful resources you need to create impressive pieces.
So let's get started and dive into the wonderful world of glass slumping!
Essential Materials for Slumping Glass
Before you begin your project, it's important to gather the essential tools you'll need to make your artistic creations. Here is a list of must-have items for your tool kit:
-
Glass: The primary material needed for slumping is, of course, glass. You'll want to choose a high-quality fusible glass that is compatible with your kiln and the slumping process. Look for glass specifically designed for glass fusing and slumping, such as Bullseye or Spectrum glass.
-
Glass Molds: To create the desired shape for your slump glass piece, you'll need a glass mold. These can be made from various materials, including ceramics, stainless steel and plaster. Choose a mold that is suitable for your project and compatible with your kiln.
-
Kiln: A kiln is an essential tool for glass slumping, as it is used to heat the glass to the proper temperature for fusing and bending. Choose a kiln that is specifically designed for glass work and has accurate temperature control.
-
Kiln Wash or Shelf Paper: To prevent your glass from sticking to the kiln shelf or mold, you'll need to apply kiln wash or shelf paper. This will help protect your glass and ensure a successful slumping process.
-
Cutting and Finishing Tools: You'll need various cutting and finishing tools to shape and smooth your glass before and after slumping. This may include a glass cutter, grozing pliers (glass breaking pliers) and grinding tools.
-
Safety Gear: Glass slumping involves working with high temperatures and sharp tools, so it's crucial to have proper safety gear. This may include heat-resistant gloves, safety goggles and a dust mask.
Understanding the Process of Fusing Glass
Before diving into the world of glass slumping, it's important to understand the glass fusing process. Fusing glass is the process of melting two or more pieces of compatible glass together to create a single, solid piece. This is often the first step in creating a slump glass piece, as the fused glass will then be placed over a mold and heated further to achieve the desired shape.
The glass fusing process typically involves three stages:
-
Heating: The glass is placed in the kiln and heated slowly to avoid thermal shock. The temperature is raised gradually until the glasses begin softening and begin to fuse together.
-
Soaking: Once the glass has reached the desired glass fusing temperature, it is held at that for a specific amount of time (known as the "soak" or "hold" time) to ensure an even and full fuse. A full fuse is generated with higher temperatures and produces a smooth finish, while a tack fuse is generated with lower temperatures and produces texture.
-
Cooling: After the glass has been fully fused, it must be cooled slowly and evenly to avoid cracking or other defects. This is known as annealing and it is a critical part of the glass fusing process.
Understanding the glass fusing process is essential for successful glass slumping, as the two processes are closely related and often used together to form three-dimensional works and art objects.
The process of glass slumping
-
Heating Phase: When the glass and mold are placed in the kiln and the temperature rises, the glass begins to heat up.
-
Softening Point: As the temperature continues to increase, the glass reaches its softening point. This is the temperature at which the glass becomes pliable.
-
Slumping Phase: When the glass is sufficiently heated and becomes soft, gravity pulls it down into or over the mold. The exact temperature at which this occurs can vary based on the type of glass and the thickness of the piece. This slumping phase is where the shape of the mold and the influence of gravity work together to form the new shape of the glass.
-
Controlling the Slump: The extent of the slumping is controlled by the peak temperature and the duration the glass is held at this temperature. If the heat is too high or the glass is left too long in the kiln, gravity can cause the glass to slump too much, potentially losing the desired shape or details.
-
Cooling Down: Once the glass has slumped to the desired shape, the kiln temperature is gradually lowered to cool and solidify the glass, preserving its new form.
Types of Glass for Slumping and Fusing
When it comes to glass slumping and glass fusing, it's important to select the right type of glass for your project. Not all glass is suitable for these processes and using incompatible glass can lead to cracking, breakage or other issues.
The two main types of glass used for slumping and fusing glass are:
-
Bullseye Glass: This is a popular choice for glass artists due to its consistent and predictable behaviour during the glass fusing process. Bullseye glass is available in a wide range of colours, textures and thickness, making it a versatile option for different types of projects.
-
Spectrum Glass: Another popular choice for glass artists, Spectrum Glass is known for its high quality and compatibility with the slumping and fusing processes. Like Bullseye, Spectrum Glass is available in numerous colours, textures and thicknesses.
When selecting glass for your project, it's crucial to ensure that it is compatible with the fusing process and that all pieces being fused together have a similar thickness and coefficient of expansion (COE). This ensures that the glass will expand and contract at the same rate during the heating and cooling process, reducing the risk of cracking or breakage.
Using two layers of glass can increase the strength and durability of the finished pieces. This is especially important for functional items like dishes, glasses or bowls that will be handled frequently.

Chemical compositions of glass
There are many different types of chemical compositions of glass that come with their distinct properties.
Soda lime glass
This is the most common type of glass, used for windows, bottles, glasses and jars. It typically contains about 70-75% silica, 12-16% soda and 5-12% lime. Minor ingredients can include alumina, magnesium oxide and boron oxide. It's relatively inexpensive and can be easily shaped when molten, but it has a lower melting point and is less chemically durable compared to other types of glass.
Borosilicate glass
This composition is often used in laboratory glassware and cookware (e.g. Pyrex). It contains silica and boric oxide (B₂O₃) as the main ingredients, with smaller amounts of soda and alumina. It's also known for its low coefficient of thermal expansion, making it resistant to thermal shock (sudden temperature changes).
Lead glass
Lead glass is commonly used in crystal glassware and stained glass windows in churches. It contains a significant amount of lead oxide (PbO), along with silica and potash (potassium carbonate). Lead increases the refractive index, making the glass turn glossy or to have a sparkling appearance, as well as making it heavier and softer (and hence, easier to cut and engrave).
Selecting and Preparing Glass Molds
The key to creating outstanding slump glass pieces is selecting and preparing the right glass mold. Slumping molds come in many different types, various materials, shapes and sizes, providing endless possibilities for your artistic creations.
When choosing a glass mold, consider the following factors:
-
Material: A glass mold can be made from a variety of materials, including metal such as stainless steel, plaster or a ceramic mold. Each material has its own benefits and drawbacks, so it's important to choose the one that best suits your needs and kiln specifications.
-
Size and Shape: Glass slumping molds come in a wide range of sizes and shapes, allowing you to produce everything from simple bowls and plates to more complex sculptures and three-dimensional forms. When selecting a mold, consider the size and shape of the finished piece you wish to make, as well as the size and capacity of your kiln.
-
Compatibility: It's crucial to choose a glass mold that is compatible with your kiln and the glass slumping process. Ensure that the mold can withstand the high temperatures required for glass slumping and that it allows for proper air circulation and heat distribution.
Once you've selected the perfect glass mold for your project, it's essential to prepare it properly start slumping. This involves cleaning the mold thoroughly and applying kiln wash or shelf paper to prevent your glass from sticking during the slumping process.
Proper mold preparation is crucial to achieving a successful slump and ensuring that your finished piece is free of defects or imperfections.
Kiln Preparation and Temperature Control
Proper kiln preparation and temperature control are crucial to the success of your kiln fired glass slumping project. Here are some key tips for preparing your kiln and achieving the perfect temperature:
-
Kiln Cleaning: Before beginning your slumping project, ensure that your kiln is clean and free of debris. This will help ensure even heating and prevent any contaminants from affecting your glass.
-
Shelf Preparation: Apply kiln wash such as Zircon Paint Refractory Coating or shelf ceramic fiber paper to your kiln shelf to prevent your glass from sticking during the slumping process. This is an essential step in ensuring a successful and smooth slump.
-
Temperature Control: The temperature at which you slump your glass will depend on the type of glass you're using and the desired outcome of your project. It's essential to consult the manufacturer's guidelines for the specific glass you're using and to follow recommended firing schedules for slumping.
-
Monitoring: During the slumping process, it's important to keep a close eye on your kiln and monitor the temperature regularly. This will help ensure that your glass is heated evenly and that the slumping process is successful.
By carefully preparing your kiln and maintaining accurate temperature control, you'll be well on your way to creating remarkable slump glass pieces that are free of defects and imperfections.
More information about kilns you can find in our article: What is a Kiln? Construction and application
Techniques for Successful Glass Slumping
There are several factors that need to be considered to achieve successful glass slumping. Here are some key tips and tricks to help you achieve the perfect slump glass top:
-
Heat Distribution: Proper heat distribution is crucial to achieving a successful slump. Ensure that your kiln is properly loaded and that your glass is placed in the centre of the mold for even heating.
-
Slumping Schedule: The slumping schedule will depend on the type of glass you're using and the desired outcome of your project. It's important to follow a recommended firing schedule for slumping and to adjust your firing schedules as needed based on the results you're seeing.
-
Airflow: Proper airflow is important during the slumping process to ensure even heating and prevent any hot spots. Make sure that your kiln vents are open and that air can circulate freely around your glass.
-
Cooling: Once the slumping process is complete, it's important to let the warm glass cool slowly and evenly to avoid any cracking or breakage. This can be achieved by turning off your kiln and allowing it to cool naturally or by using a cooling oven.
By utilising these techniques and methods, you'll be able to achieve the perfect slump to create bowls, platters and other beautiful pieces that are sure to impress.
Incorporating Dichroic Glass in Your Art
Dichroic glass is a popular material used in glass slumping and fusing due to its unique optical properties. The term "dichroic" strictly refers to two colours but is often used to describe glasses with three (trichroic) or more colours (pleochroic). This type of material appears to change colour when viewed from different angles, creating a mesmerising effect.
When incorporating this type of texture of glass into your slump glass art, consider the following tips:
-
Compatibility: Ensure that your glass is compatible with the fusing and slumping process and that it has a similar COE to the other glass you're using.
-
Layering: Layering the glass with other types of glass can result in a remarkable effect and add depth and complexity to your slumped piece.
-
Placement: Consider the placement of your glass carefully to achieve the desired effect. Placing it on the top or bottom of your slumped glass piece can produce a stunning visual effect when viewed from different angles.
-
Experimentation: Don't be afraid to experiment with different colours and patterns of glass to achieve the perfect look for your slump glass piece.
Incorporating this into your slump glass art can add a unique element to your work, creating a piece of art glass, that is truly one-of-a-kind. This type of material will work perfectly to create beautiful pendants, jewelry, decorative glass bowls, plates, platters and other kinds of art pieces.
Glass Casting and Sheet Glass Applications
While slumping and fusing are two of the most common techniques used in shaping glass art, there are several other methods and applications that can be used to produce striking glass pieces. Two of these methods are glass casting and sheet glass applications.
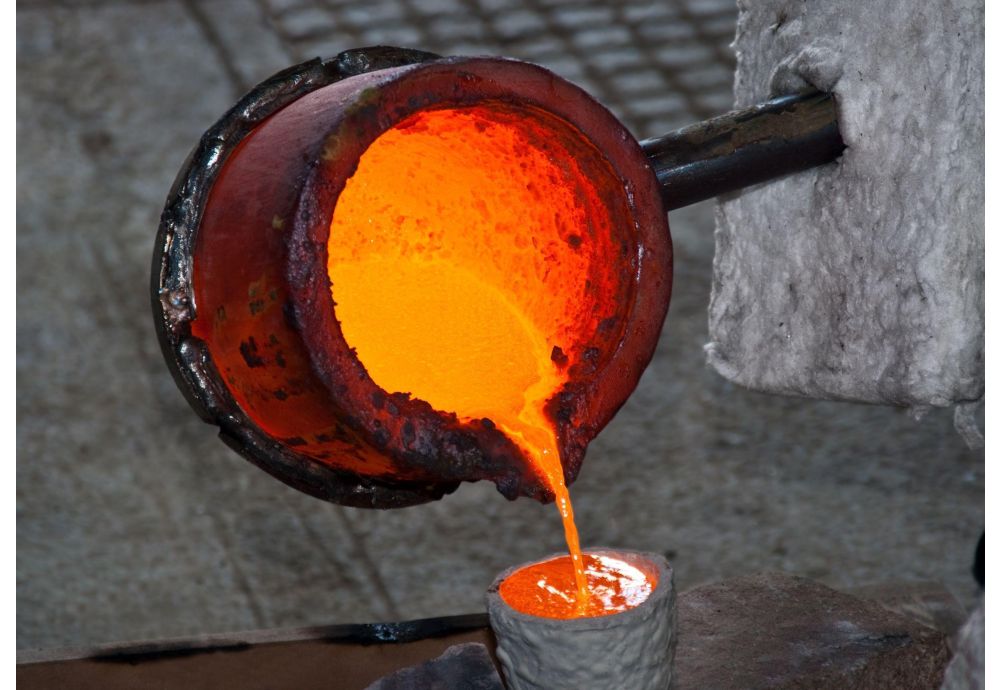
Glass casting
Glass casting involves pouring molten glass into a mold to create a three-dimensional piece. This method can be used to create complex shapes and designs that are difficult to achieve through slumping or fusing.
Sheet glass
Applications involve cutting and layering sheets or layers of glass to create intricate designs and patterns.
Both of these methods require a specialised technique and set of tools. However, each technique can produce stunning results when executed with skill and precision.
Troubleshooting Common Glass Slumping Challenges
While glass slumping can be a rewarding and exciting art form, it's not without its challenges. Here are some common issues that may arise during the slumping process and how to troubleshoot them:
-
Cracking or Breaking: This can occur if the glass is heated too quickly or cooled too rapidly. To prevent cracking or breaking, follow recommended firing schedules and ensure that your kiln is properly loaded and ventilated.
-
Sticking or Shattering: If your glass sticks to the mold or shatters during the slumping process, it may be due to improper mold preparation or insufficient kiln wash or shelf paper. Ensure that your mold is properly cleaned and prepared and that you're using sufficient kiln wash or shelf paper.
-
Uneven Slump: If your slump glass piece is uneven or distorted, it may be due to improper heat distribution or an improper slumping schedule. Ensure that your kiln is properly loaded and ventilated and that you're following a recommended firing schedule.
By troubleshooting these common glass slumping challenges, you'll be able to overcome any obstacles and achieve flawless slump glass pieces.
Expert Tips for Stunning Artistic Creations
Now that you have a solid understanding of the glass slumping process and techniques, here are some expert tips to take your artistic creations to the next level:
-
Experimentation: Don't be afraid to experiment with different colours, patterns and techniques to make unique and beautiful pieces.
-
Attention to Detail: Pay close attention to the details of your piece, from the placement of the glass to the temperature and timing of the slumping process. Small details can make a big difference in the final outcome.
-
Practice, Practice, Practice: Like any art form, glass slumping takes practice to master. Don't be discouraged by early failures or imperfect pieces. Keep practicing and refining your technique to achieve the desired result.
By following these tips, you'll be well on your way to creating a one-of-a-kind object that will last you for years to come. You may also be interested in: Mastering the Art of Pottery Craft Ceramics
Conclusion
Slumping glass is an exciting and versatile art form that allows artists, as well as ordinary hobbyists, to express their creativity. By following the tips and techniques outlined in this guide, you'll be well on your way to making artistic creations that you'll be proud to display in your home.
Remember to experiment, pay attention to detail and practice, practice, practice. With the right tools and technique, the possibilities for shaping glass with slumping are truly endless.
So go forth, and create!