Building your own outdoor kitchen lets you design a custom space that matches your exact needs. Most people include a barbecue grill, countertops, storage areas and a sink. On top of that, you can revolutionise your outdoor cooking with a Vitcas traditional wood-fired oven.
A DIY outdoor pizza oven brings rustic charm to your space and offers amazing cooking flexibility. You can make everything from crispy pizzas to artisan bread. In this article, we will guide you through each step to create a functional and stylish space, whether you want a basic setup or a complete outdoor kitchen with a bar.
Designing Your Outdoor Kitchen and Bar
A great outdoor kitchen starts with smart design. Your space should look good and work well for cooking and entertaining. This design stage helps bring your ideas to life while striking the right balance between style and function.
Visualising your layout and zones
Smart zoning makes outdoor kitchens work better. Map out spaces for food prep, cooking and cleanup to create an efficient workflow. People should move easily between these areas while you entertain guests.
The distance from your indoor kitchen matters a lot. Placing your outdoor cooking space near the house creates smooth connections between both areas. This setup makes carrying food and drinks much easier.
These layouts work really well for outdoor kitchens:
-
L-shaped designs: Perfect for corners with plenty of counter space
-
U-shaped layouts: Great for bigger areas that need an enclosed cooking zone
-
Galley-style: Fits nicely against walls and protects from weather
Your seating should adapt to different party sizes. Keep cooking and dining areas close enough to chat with guests while you prepare meals.
Choosing a rustic or modern style
The kitchen should match your home's aesthetic and your garden style. Rustic designs use natural materials like stone, timber and brick. These create lasting appeal that blends with outdoor spaces. Modern designs feature clean lines, stainless steel parts and simple structures.
Rustic charm comes from textured or weathered finishes. Board and batten bases look great with leathered granite counters, creating an earthy feel. Stone walls and wooden details add character while standing up to outdoor conditions.
Modern designs focus on clean lines and tough materials like stainless steel or concrete. All the same, adding natural elements helps these designs fit better with garden settings.
Tough materials matter whatever style you pick. Non-porous countertops made from granite, concrete or treated stainless steel handle weather well. Sandstone or composite decking works great for floors since they handle heavy foot traffic and spills.
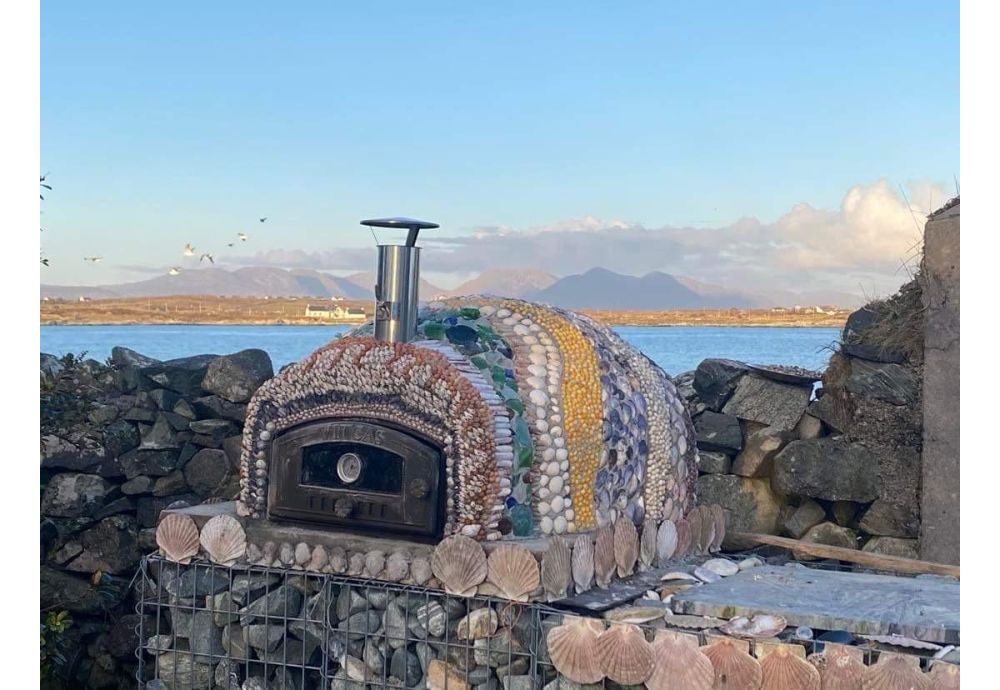
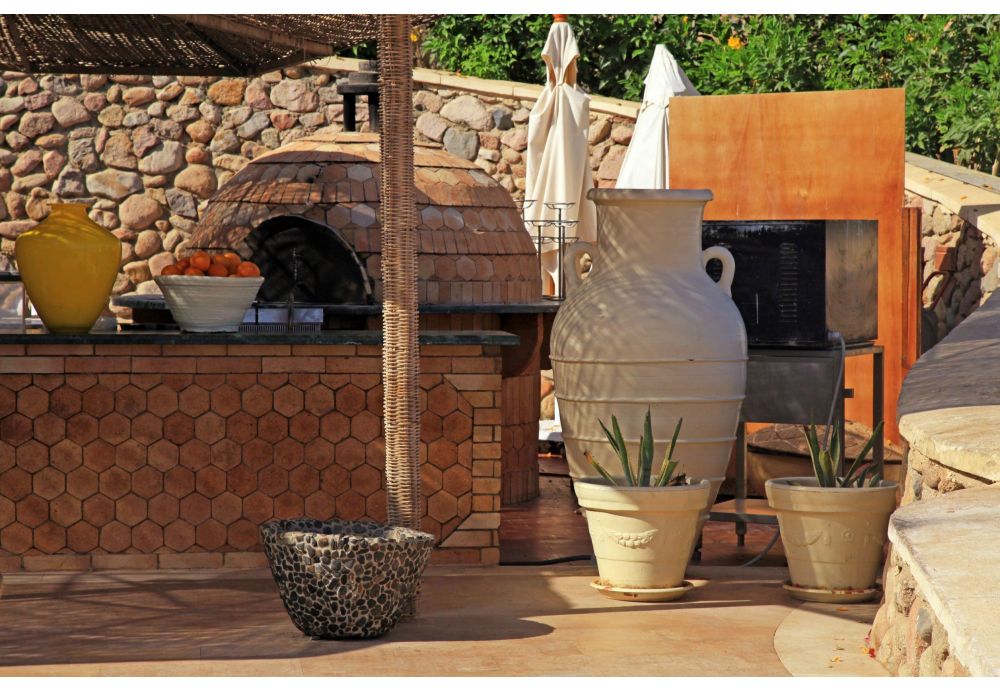
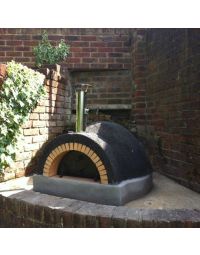
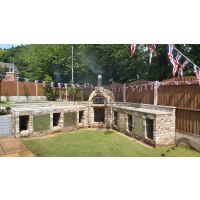
Incorporating a traditional wood-fired oven into the design
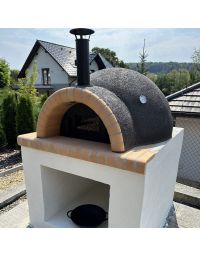
Vitcas traditional wood-fired ovens make stunning centrepieces that cook amazing food. Place your Vitcas wood-fired pizza oven where it looks optimal and works well within your layout.
Smart designs use the space under oven supports to store logs, which looks great and saves space. Adding a door, flue and chimney lets you control heat better for cooking different dishes.
Your Vitcas oven should fit your overall design theme. Match it with similar materials whether you want rustic stone or modern looks. Create a special space around it that shows off this feature.
Weather protection options like pergolas, gazebos or partial roofs keep your cooking area dry without trapping smoke. Good lighting around the oven helps you cook easily even after dark.
The wood-fired oven becomes a social hub naturally. You will show off your cooking skills while staying connected with guests instead of being stuck indoors.
Choosing the Right Materials and Appliances
Your DIY outdoor kitchen project needs durable, high-quality materials as its foundation. Smart material choices will protect your cooking space from weather damage and give you years of great cooking experiences.
Tropical wood for durability and aesthetics
Hardwood species work better than softwoods in outdoor settings. You should skip softwoods like pressure-treated pine, cedar and redwood because they can rot, attract insects and catch fire. These materials also need annual waterproofing sealer maintenance.
Here are some excellent tropical hardwoods that withstand outdoor conditions:
-
Ipe wood - This Brazilian hardwood naturally fights off insects, rot and water damage. Good installation helps it last even up to 75 years or longer with minimal upkeep. Its dark rust-red to blackish-brown colours add a refined, rustic look to your kitchen space.
-
Cumaru (Brazilian teak) - This wood works like Ipe but comes with beautiful colour variations from reddish-brown to golden brown. It fights rot and moisture naturally and tends to be a more economically viable option.
Catalpa might be worth looking into as well. This North American hardwood resists rot and moisture but proves easier to work with than tropical varieties. Stainless steel makes great framing material, though treated wood costs less if you're budget-conscious.
Refractory materials and insulation
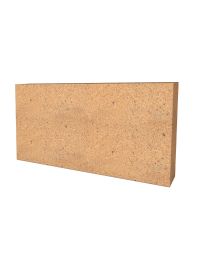
The core of your wood-fired pizza oven must be built with specialised refractory materials capable of withstanding the extreme temperatures generated during use-up to 1200°C (2190°F). Using heat-resistant materials is critical for both safety and long-term performance.
Here are the key components you will need:
- Fire bricks - High-density refractory fire bricks designed to withstand intense heat without cracking or degrading. They form the core structure of the oven chamber and cooking floor.
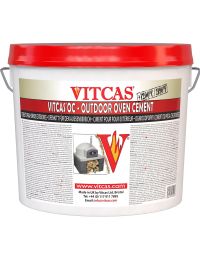
- Vitcas Outdoor Oven Cement - A high-performance aluminate-based hydraulic binder specially formulated for bonding fire bricks and assembling Vitcas oven components. It resists extreme temperatures, mechanical stress, and chemical corrosion.
- Insulation materials - Proper insulation is essential for retaining heat, cooking food evenly and protecting surrounding structures. Vitcas Ceramic Fibre Insulation Board and Ceramic Fibre Blanket are ideal options, providing exceptional thermal resistance and improving fuel efficiency.
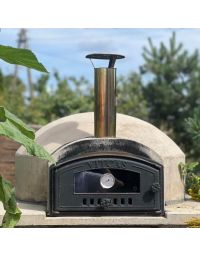
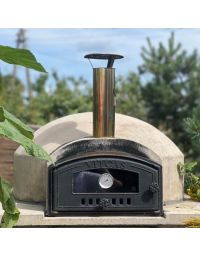
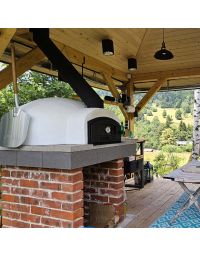
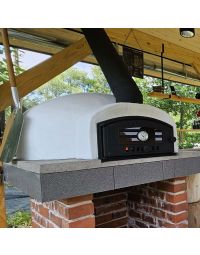
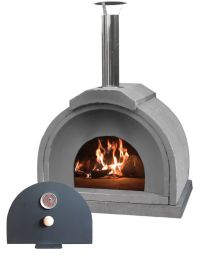
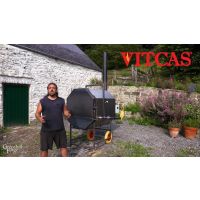
Selecting a Vitcas outdoor oven for pizza and bread
Vitcas offers various wood-fired ovens to fit different needs. The Pompeii 100 model features a classic dome shape and fits 3-5 pizzas at once. Whereas, the compact Vitcas Casa works better in smaller gardens, cooking 1-2 pizzas while delivering authentic wood-fired flavour.
These versatile ovens can cook more than pizza - they're great for bread baking, roasting vegetables, and slow-cooking dishes. Nothing matches the unique taste of wood-fired cooking, making these ovens a valuable addition to outdoor kitchens.
Your outdoor pizza and bread oven needs a fireproof platform with proper insulation. Vitcas suggests curing the oven by lighting small fires over two days, slowly raising the temperature to remove any moisture.
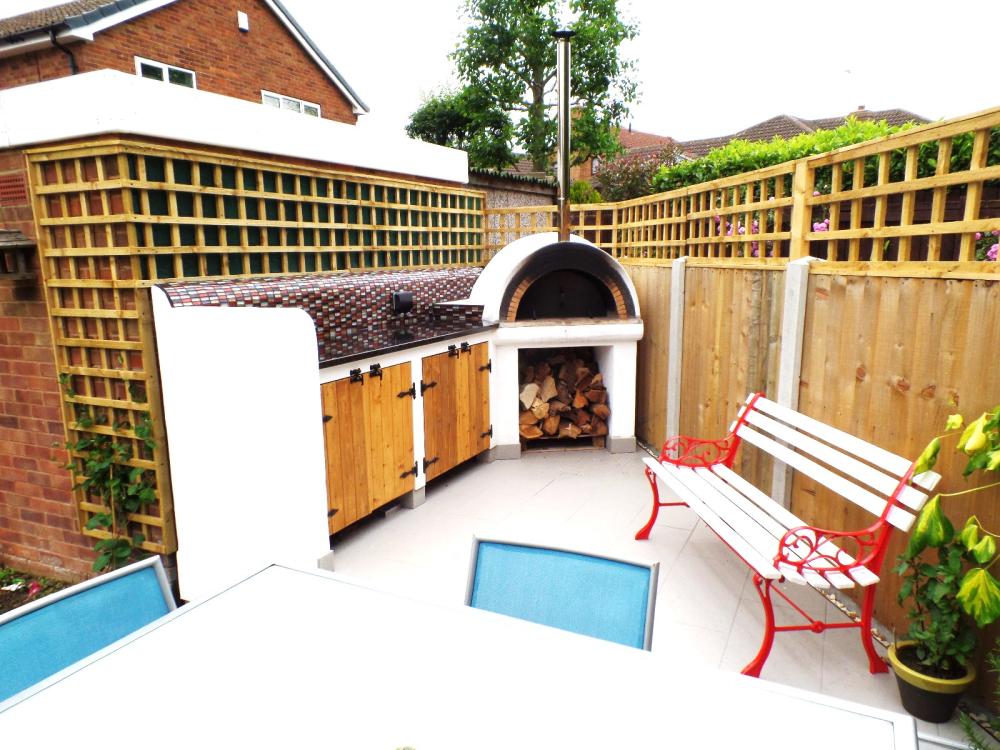
Additional appliances: BBQ, cooking area, sink & fridge
After setting up your outdoor wood-fired oven centrepiece, you might want extra appliances to boost functionality.
Adding a barbecue grill to your outdoor kitchen expands your cooking options and enhances the overall functionality of the space. A charcoal grill adds authentic smoky flavour, while a gas grill offers convenience and precise temperature control. Side burners help you cook sauces and side dishes.
Whether you choose a built-in gas grill, a freestanding charcoal barbecue, or a ceramic cooker, ensure it is positioned in a well-ventilated area with sufficient clearance from combustible materials. For a cohesive look, you can build the barbecue into the same non-combustible framework used for your pizza oven, using insulation boards and fire-resistant cladding.
Consider installing worktop space on either side of the grill for preparation and serving, along with storage cabinets below for tools and fuel. With careful planning, your barbecue becomes a seamless and stylish part of your outdoor culinary setup. Granite worktops offer ideal features - they are durable, heat-resistant, waterproof, and non-absorbent, perfect for outdoor use. They come in various finishes like honed, satin, or gloss, mixing great looks with practicality.
Adding a sink with tap makes cooking outdoors more hygienic and convenient - no more running inside to wash hands or rinse tools. You will need water supply and waste pipes buried underground that come up inside your sink cabinet.
An outdoor fridge keeps drinks and ingredients cold while you cook. These just need a power connection. If you plan to use electric appliances, get an electrician's help with outdoor power outlets.
Building the Structure Step-by-Step
Your design vision comes to life during the construction phase. A well-planned and executed outdoor kitchen's structural components will serve you for years.
Installing the frame
There are three main frame options: metal, concrete blocks, fire bricks or wood. Metal frames with metal bar supports are lightweight and space-efficient, but they require proper support and insulation on top.
Likewise, wood offers a simple solution but it also must be sufficiently supported and insulated. You just need to cut pressure-treated timber boards to length and assemble the frame while keeping all sections level. Add strength with galvanised screws and corner brackets. If you do not possess masonry skills, avoid using wood beneath or directly around the wood fired pizza oven, as high temperatures can pose a fire risk. It is best to reserve wood framing or elements for adjacent cabinets, seating and prep zones.
Fire bricks and concrete blocks offer the most durable and fire-resistant solution, making them ideal for supporting high-temperature components like a wood-fired pizza oven.
Fireproof base and insulation
Your Vitcas outdoor wood-fired oven must be installed on a fireproof, solid base capable of supporting significant weight-at least 200 kg for smaller models and 300 kg or more for larger models. This platform should be designed for both structural strength and thermal insulation to ensure long-lasting performance and safety.
Start with a solid concrete base or insulating plinth made from dense, cast-in-place concrete. Do not use steel reinforcement, as metal can deform, degrade or conduct heat dangerously when exposed to the high operating temperatures of a wood-fired oven.
After the concrete slab or insulation plinth has been installed, the base structure will require proper insulation, e.g. a high-temperature insulation board such as the Vitcas Ceramic Fibre Insulation Board. This insulating board will act as the thermal insulation layer between the plinth and the oven base to prevent heat loss. Using Vitcas Ceramic Fibre Board also ensures that heat remains concentrated inside the cooking chamber-resulting in faster cooking, greater temperature stability and extended structural life for the base.
Installing the oven base and outdoor pizza oven
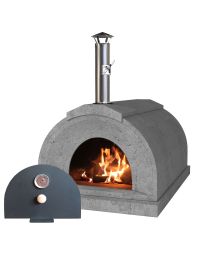
Vitcas outdoor wood-fired ovens, such as the Casa and Pompeii models, include a base section, multiple dome segments, a front arch and a flue outlet.
Begin by positioning the base section, then carefully install the rear and side dome pieces, followed by the front arch and flue connector. Make sure all segments are properly aligned and seated.
Seal all joints using Vitcas Heat Resistant Silicone - a high-temperature, flexible sealant suitable for the oven's operating conditions. Do not use Outdoor Oven Cement for sealing the joints between the pre-cast sections, as it is intended for bonding fire bricks and other masonry components.
Finishing Touches & Outdoor Living Features
Your outdoor kitchen structure needs those final touches that turn it from a basic cooking area into a captivating entertainment space. The following elements will add both function and charm to your DIY outdoor kitchen and make it uniquely yours.
The outdoor bar
To elevate your outdoor kitchen experience, consider incorporating a built-in bar area. Whether it's a sleek countertop with high stools for casual drinks or a fully stocked bar with shelving for spirits and mixers, a dedicated bar space turns your cooking zone into a complete entertainment hub. It is ideal for serving cocktails while the pizza bakes in the wood-fired oven or enjoying a cold drink while the BBQ sizzles. With the right lighting and weather-resistant materials, your bar becomes a stylish and functional extension of your outdoor living space.
Adding lighting and heating
Good lighting lets you use your outdoor kitchen even after dark. Mix different types of lights: bright ones to light up work areas, soft lights to set the mood, and decorative ones to enhance visual appeal.
Your cooking areas need downlights or spotlights. String some festoon lights overhead or outline the kitchen's edges to create a cosy ambience. LED strip lighting beneath counters, combined with ground lights, eliminates harsh shadows and adds a sleek finish to your outdoor kitchen.
Infrared radiant heaters are an efficient way to stay warm during cooler months. They provide instant heat by warming people directly, rather than the surrounding air, and are often more cost-effective than traditional outdoor heaters.
Outdoor furniture and bar stools
The right outdoor furniture works hard and looks good doing it. Small round tables are perfect for coffee and snacks, while bigger dining sets work great for dinner parties and hanging out.
Set up your furniture to create different areas in your outdoor space. Keep dining separate from lounging to make it feel more put together. A bar area with stools gives friends a spot to chat while you cook.
Decorative elements and storage ideas
Smart storage keeps your outdoor kitchen organised. Cabinets with doors protect your items from the elements. Open shelves look nice but get dirty fast outdoors.
Enamel plates and dishes are tough and stylish without breaking. You will also need special spots to store ice buckets, bins and recycling containers.
Outdoor lighting, garden ornaments and water features help establish a relaxing, inviting atmosphere. These finishing touches elevate your DIY outdoor kitchen from functional to exceptional.
Cooking, Entertaining and Maintenance
A DIY outdoor kitchen brings joy not just in its construction but when you become skilled at using and maintaining it. You'll get the most from your investment by learning to cook well, host guests and keep everything in top shape.
How to cook with a Vitcas wood-fired oven
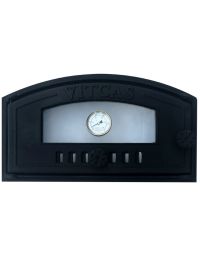
Getting perfect results from your wood-fired oven depends on temperature control. Heat your Vitcas wood-fired oven to about 450-500°C at first, then let it cool to 100-190°C to bake bread. Pizza needs a hotter oven floor around 370°C. Our thermometers will help you track these temperatures accurately.
Your pizza should go right in the middle of the oven where heat spreads evenly. Give it a 180-degree turn after 40-50 seconds to cook it uniformly. The pizza should come out perfect in just 60-90 seconds. The oven works great for other foods too - try focaccia, bread, slow-cooked meats, vegetables, and even desserts.
Hosting outdoor pizza nights
Pizza parties outdoors create memories that last. Make your dough ahead and set up a topping station. Offer different sauces, cheeses and toppings that match everyone's priorities. Let guests build their own pizzas to make cooking fun while keeping things relaxed.
You will need these must-have tools to host successfully:
-
Pizza peels to move pizzas in and out of the oven
-
Heat-resistant gloves to handle hot items safely
Cleaning and protecting your kitchen
Your outdoor kitchen needs regular cleaning. Wood parts need a stiff brush, warm water and pH-neutral soap. Stainless steel needs special cleaners to stay rust-free. Oak surfaces should get penetrating oil every 2-5 years based on weather exposure.
The wood-fired oven cleans itself with high heat that kills bacteria naturally. Just let it cool completely and sweep out the ash with a metal brush.
Tips for winter and summer use
Winter demands extra protection for your outdoor kitchen. Keep wood-fired ovens covered when not cooking. The water system needs complete draining before freezing hits - close the valves, open taps and take off aerators. Any refrigeration units in exposed areas should disconnect from power during freezing weather.
Summer lets you use your outdoor kitchen often while watching for wear. Oak wood naturally turns a beautiful silver-grey that shows off its grain patterns. Good maintenance will keep your DIY outdoor kitchen as the perfect spot for entertaining whatever the season.
A Garden Transformation That Sizzles
A traditional wood-fired oven will revolutionise your garden into a versatile entertainment space. This combination of functionality, aesthetics and culinary delight creates something special. Quality materials and thoughtful design will result in an outdoor cooking area that matches indoor kitchens in both capability and charm. At the heart of this space is the Vitcas bread and pizza oven, offering a wood-fired cooking experience that standard appliances simply can't match. Even without advanced construction skills, this project stays achievable thanks to a clear step-by-step approach-from laying foundations and installing fireproof platforms to fitting appliances and adding final touches. Your outdoor kitchen goes beyond just a cooking area - it reflects your home and personality. Rustic charm from tropical hardwoods combined with durable materials creates a space that handles weather while looking great year after year. Your efforts create a gathering place where fresh pizzas and slow-cooked delicacies become cherished memories.
The real joy comes when you share it-hosting pizza nights or summer BBQs in a space you built brings people together in a special way.
Now's the time to roll up your sleeves and build the outdoor kitchen of your dreams-your guests and your taste buds will thank you!