Gluten-free bread, a staple for those unable to digest gluten or diagnosed with Celiac Disease, substitutes traditional flours with alternatives like chickpea, almond and quinoa flours. Originating from necessities such as rice, corn, potato starch and key ingredients like xanthan gum, today's gluten-free bread recipes have evolved to incorporate a myriad of gluten-free flours, promising a wealth of baking alternatives that cater to a gluten free diet while offering diverse flavours and textures.
Crafting the perfect loaf of gluten-free bread in a wood-fired oven not only involves selecting the right gluten-free flour blends, such as buckwheat flour, rice flour and millet flour, but also mastering the use of ingredients like baking powder, psyllium husk and apple cider vinegar to achieve artisan bread quality. This guide will navigate through the step-by-step process from creating your gluten-free dough using ingredients like brown rice flour, potato starch and almond flour, to baking an aromatic, homemade bread that's both gluten and, if desired, dairy-free. This transformative approach aims to elevate your baking experience, ensuring your gluten free bread not only caters to dietary needs but also rivals regular bread in flavour and texture.
Understanding Gluten-Free Flours
Understanding the diverse options that exist when it comes to gluten free flour is crucial for making gluten-free bread that is as delicious as regular bread made from wheat flour. There are various types of gluten free flour, all possessing distinct properties and uniquely contributing to gluten-free baking:
Grain and Legume Flours
White and Brown Rice Flour:
Provide structure and a mild, versatile flavour suitable for various bread types.
Buckwheat Flour and Sorghum Flour:
-
Both being rich in nutrients, buckwheat flour and sorghum flour offer an earthy taste that complements hearty bread recipes.
Chickpea Flour:
-
High in protein and fibre, chickpea flour adds density and a slight nuttiness.
Starches and Gums
-
Common Starches: Corn, tapioca, arrowroot and potato starch add lightness and airiness to the bread texture and help achieve that tender crumb.
-
Xanthan and Guar Gum: Act as binders, replacing gluten's role in providing elasticity and stickiness to the dough.
Nutritional and Textural Enhancers
-
Psyllium Husk Powder: A natural fibre that helps in moisture absorption, giving the bread a chewier texture.
-
Almond, Coconut and Oat Flour: Not only do these flours add a nutritional boost, but they also introduce unique flavours and textures to the bread, ranging from nutty to subtly sweet.
By combining these ingredients thoughtfully, one can create gluten-free bread that rivals its gluten-containing counterparts in both taste and texture, catering to the needs of individuals with celiac disease or gluten sensitivity.
Creating Your Gluten-Free Bread Dough
To create a gluten-free bread dough that's not only delicious but also suitable for baking in a wood-fired oven, follow these carefully curated steps:
Gluten free bread recipe
-
Mix Dry Ingredients:
-
In a large mixing bowl, combine gluten-free all-purpose flour, baking powder and instant yeast.
-
For a different gluten free bread recipe variation, mix white rice flour, tapioca starch, potato starch or arrowroot starch, millet flour or almond flour, ground flaxseed, xanthan gum, baking powder and salt.
-
To achieve a texture similar to that of a deli-style, gluten free sandwich bread, it's essential to use water for activating the yeast and oil as a substitute for butter.
-
-
Incorporate Wet Ingredients:
-
Gradually add olive oil, honey, apple cider vinegar and warm water to the dry mix, blending at low speed for 1 minute. A stand mixer is the most convenient to use for this.
-
Add room temperature egg whites (or egg substitute for a vegan option) and salt, mixing on medium speed for another minute.
-
For recipes requiring a liquid, warm milk can be used in place of water for added richness.
-
-
Proofing and Shaping:
-
Pour the dough into a prepared loaf pan or loaf tin, covering it with a damp tea towel. Let the dough rise in a warm place for 30 minutes to an hour, depending on what the recipe calls for.
-
For artisan-style loaves, after the first rise, shape the dough again and allow it to rise for another hour.
-
Following these steps ensures a bread dough that's perfectly suited for the unique cooking environment of a wood-fired oven. Whether you're baking artisan gluten-free bread or some sourdough gluten free sandwich bread for a grilled cheese, these instructions will not fail you.
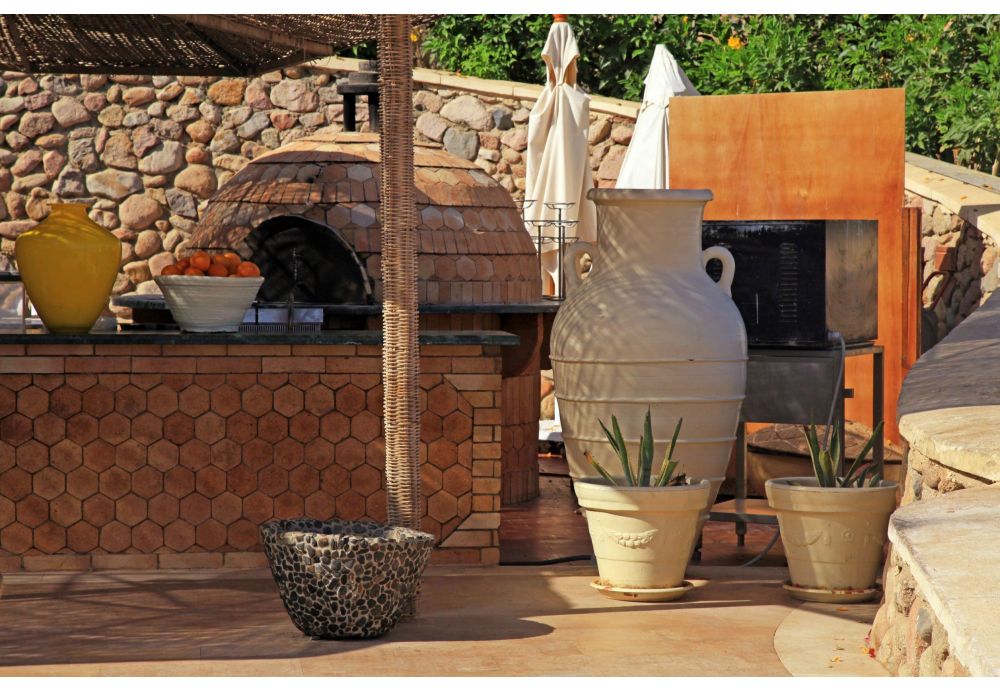
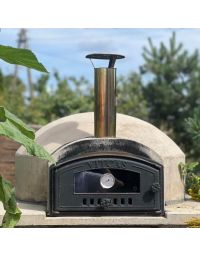
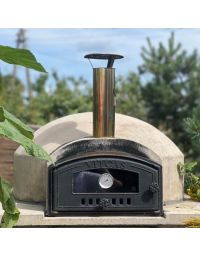
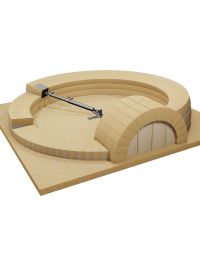
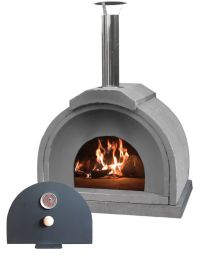
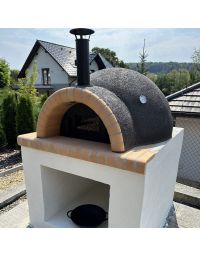
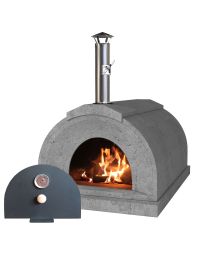
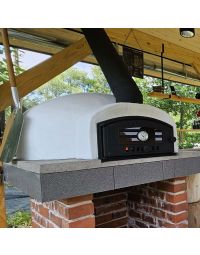
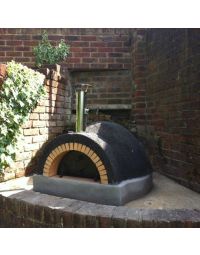
Preparing Your Wood-Fired Oven
Preparing your wood-fired oven for making gluten-free bread requires attention to detail to ensure the oven reaches and maintains the optimal temperature for baking bread. Here's a step-by-step guide to get your oven ready:
-
Building the Fire:
-
Open the oven door and vents before starting the fire to ensure proper airflow.
-
Create a 'log cabin' structure with hardwood pieces and kindling, placing an andiron at the back of the oven and a firelighter in the kindling.
-
Light the fire using a preferred method (blow torch, matches, lighter) and commit to tending the fire until it's time to cook.
-
-
Heating the Oven:
-
Allow the fire to burn for 1.5 to 2 hours, ensuring the oven floor and dome are evenly heated.
-
In the last hour, move the fire around to evenly distribute heat and achieve a half-white ceiling and a hot floor near the doorway.
-
If the atmosphere is damp, use ultra-dry wood to boost the fire.
-
-
Preparing for Baking:
-
Once the oven reaches 343 - 371º C (650-700º F), clear the dome of black soot by moving the fire or adding fuel.
-
Push the fire to the side of the oven, leaving space for the bread.
-
Scuff the oven floor with a damp tea towel, then allow the oven to settle and the temperature to even out before loading the dough.
-
Shaping and Proofing Your Loaf
Shaping and proofing your loaf are crucial steps in the bread-making process, especially when working with gluten-free dough. Here's how to effectively shape and proof your gluten-free bread for optimal results:
-
Using Alternative Bannetons:
-
If bannetons are out of reach, opt for plastic bread baskets lined with cloth napkins and coarse flour. This setup works just as well for proofing your dough.
-
Deflating and Shaping:
-
Gently deflate the dough to about half its size before shaping. This step is essential for forming a tight structure.
-
For a boule, press the dough into a disk, fold ends to the center, flip and round it by pulling towards yourself to seal the bottom.
-
To make gluten free sandwich bread, press the dough into a rectangle, fold sides and roll towards yourself, sealing as you go.
-
For pizza bases, begin on a floured surface, press and stretch the dough from the center out, then transfer to a floured parchment paper/baking sheet for further thinning.
-
-
Proofing:
-
After shaping, allow the dough to rise in the baskets for 45 minutes. Whether you're making boules, sandwich loaves or pizza bases, this proofing time is crucial for the dough to develop the right texture and structure before baking. Remember, specific bread types like dinner rolls, bread sticks, cinnamon rolls and challah should be shaped before their final proofing phase.
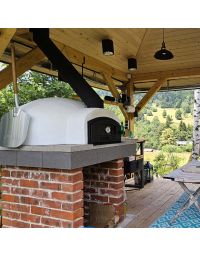
Baking Gluten-Free Bread in a Wood-Fired Oven
Baking gluten-free bread in a wood-fired oven is on a whole another culinary level than baking in bread machines. To ensure success, follow these guidelines:
-
Preparation and Safety:
-
Sweep the Oven Floor: Just before loading the dough, sweep the oven floor to clean any residual ash. This step is critical for a clean baking surface.
-
Steam Creation: Use a garden sprayer to mist water onto the oven dome, creating steam. This steam is crucial for a crispy crust and moist interior.
-
Oven Door: After loading the oven, seal it with the door. Be cautious when reopening, as built-up steam can rush out, posing a burn risk.
-
-
Baking Process:
Baking Time: Note that the baking time in a wood fired oven is generally shorter due to the trapped steam and high heat, enhancing the crust and texture of the gluten free bread.
-
Temperature Check: Use a thermometer to ensure the bread reaches an internal temperature of 96 - 98ºC (205-210ºF), indicating it's done.
-
-
Post-Baking Tips:
Cooling: Allow the bread to cool completely for at least 10 minutes for baguettes and 20 minutes for boules. This step is essential to prevent the bread from becoming crumbly.
-
Bread Pan Selection: Opt for a metal loaf pan, which is better at fully cooking the loaf without over-browning. Alternatively, the bread can go in and sit directly on the oven floor. A Dutch oven is unnecessary to use for baking bread in a wood burning oven.
-
-
You can customise your gluten free bread recipe to your liking. For example, you can add flax seeds, chia seeds or pumpkin seeds to make gluten free bread even tastier.
Conclusion
Embarking on the journey of making your own homemade gluten-free bread in a wood-fired oven opens up a realm of culinary creativity and ensures that dietary restrictions don't compromise the joy of baking and consuming delicious, artisan-style bread. From selecting the right gluten-free flour blend and mastering the use of key ingredients for optimal dough consistency, to understanding the nuances of wood-fired oven preparation and the specific steps for baking, we've navigated through a comprehensive process. This not only addresses the dietary needs of individuals with gluten intolerance but also promises an enriched, flavourful baking experience that rivals traditional bread-making methods.
The significance of this guide stretches beyond simple bread-making; it encapsulates a movement towards inclusivity in baking arts, catering to the diverse needs of the modern culinary landscape. As you refine your skills and experiment with different gluten-free flours and techniques, remember, the process itself is as rewarding as the delectable, aromatic loaves you produce. Encouraged to further explore the boundless possibilities of gluten-free baking, let this guide be a stepping stone towards mastering the art of baking the perfect gluten free bread in a wood-fired oven, making each loaf a testament to craftsmanship, flavour and dietary awareness.
FAQs
What are the key techniques for creating quality gluten-free bread? To make better gluten-free bread, consider the following tips and techniques:
-
Use psyllium husk powder to improve texture.
-
Allow the dough to rest, which is slightly different from a traditional bulk proof.
-
Mix or knead the dough thoroughly to combine ingredients well.
-
Use a smaller quantity of yeast than you might with gluten-containing bread.
-
Bake the bread in a bread loaf tin with tall sides to help it rise.
-
Bake for a longer time, often at a lower temperature, to ensure it's cooked through.
-
Create steam in the oven to help the crust develop.
-
Use the tangzhong or scalded flour method to enhance the bread's softness and shelf life.
How do you prepare gluten-free bread? Gluten-free bread is typically made through the following steps:
-
Proof your yeast according to the package directions.
-
Combine your chosen gluten-free flours and other dry ingredients.
-
Add the proofed yeast and any additional wet ingredients to the mix.
-
Allow the dough to rise until it's ready for baking.
-
Bake the bread until it's fully cooked and has a nice crust.
Is it possible to bake gluten-free bread in a wood-fired oven? Yes, you can bake gluten-free bread in a wood-fired oven. These ovens are versatile and can be used to bake a variety of bread types, including wood oven sourdough recipes. Wood-fired ovens offer a taste that is unrivalled by a bread machine or bread maker. Perfect for bread enthusiasts and those who dream of baking bread in the outdoors.
Will gluten-free bread rise during baking? Gluten-free breads are inherently denser than regular bread made with wheat and hence, they generally do not rise as high. Most of their expansion occurs in the oven, a phenomenon known as oven spring. It's normal for there to be minimal visible change during the resting period after the bread is shaped.