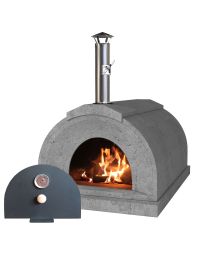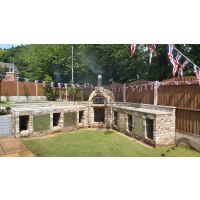
So you’ve just built (or received) your pizza oven. It’s almost ready and you are looking forward to freshly made, delicious food. It’s going to taste so good, you can almost smell it.
Hold your horses! We don't mean to be a party pooper, but it is imperative that you cure your oven before you use it and that you do this properly.
Why does a pizza oven need curing?
When you first build your oven, the construction materials such as the concrete you use and mix, will have remaining moisture inside from the manufacturing or building process. There will be excess water in almost all oven components, including the hearth concrete, the mortars, the vermiculite, the oven chamber and the oven vent. You need to slowly let the moisture out, which is a way to strengthen the entire structure and to ensure that it is long lasting, durable and does not crack.
Here are a few reasons why proper curing is essential:
- A pizza oven with an excess water content may have a shorter life span,
- Lack of proper curing runs the risk of breaking seals, cracking and even spalling (spalling is when the water inside is so hot that it turns to steam and having nowhere to go, causes a piece of the surface to blow off leaving craters behind),
- The temperature inside will not rise to the optimal temperature for cooking because the oven will be working overtime to drive out the excess moisture.
We are going to give you a step by step account of how to cure a pizza oven. For a start:
- Make sure you follow the instructions carefully. If you have had your oven installed by professionals, they will have given you instructions. They may even do the curing for you but if not, follow the instructions carefully or you will end up with a cracked pizza dome, or worse.
- If you have built your own beautiful pizza oven, you will have had guidelines for building. The same guidelines will come with information on how to cure your pizza oven. Follow them carefully so that all your hard work does not go to waste, and so that you get the best possible use out of your oven.
Do you want to learn how to build your own pizza oven? Read our previous articles.
When do you cure a pizza oven?
Once you have built your pizza oven, especially if you have undertaken this project on your own and are making a DIY oven, then let your complete oven sit, unused, for a good seven days. Again, read the instructions that came with your DIY manual, as some pizza ovens don’t require this amount of time. If you have made your own DIY oven, let it sit for a week, let the moisture start to dry out on its own and then begin the curing process.
NOTE: If you are planning on adding insulation on the outside of the oven (which we recommend), you must complete the curing process first. If you don't, then when you fire the oven all this water will have nowhere to go and will make the insulation soggy and ineffective.
Curing process
Steps to cure a wood fired oven
You are going to begin curing your new oven over a period of five days, starting slowly. You need to be patient - yes, we know you are dying to make your own pizza but it is going to be well worth the wait - and you need to be consistent. Curing a pizza oven slowly requires a fire to be started daily, for five days in a row (sans any cooking). This is a process that you need only do thoroughly once. The water which was deep inside the structure will not come back. Of course, it may get wet again in the rain, but this is superficial and should not cause any problem with the oven, which is protected by insulation.
Each time you fire the oven, it will get up to temperature quicker and cook more efficiently. Once you have cured properly, you are set to go!
Day One
Set a time for curing and stick to it daily. For instance, if you choose 9 am, then do 9 am or as close to 9 am as you can, for the next five days.
When you start your fire, use the oven door more as a windbreak than as a door. Keep it ajar, with a one inch gap (25mm) between the oven door and the oven. You can lean the door on its handle to keep it upright but not closed.
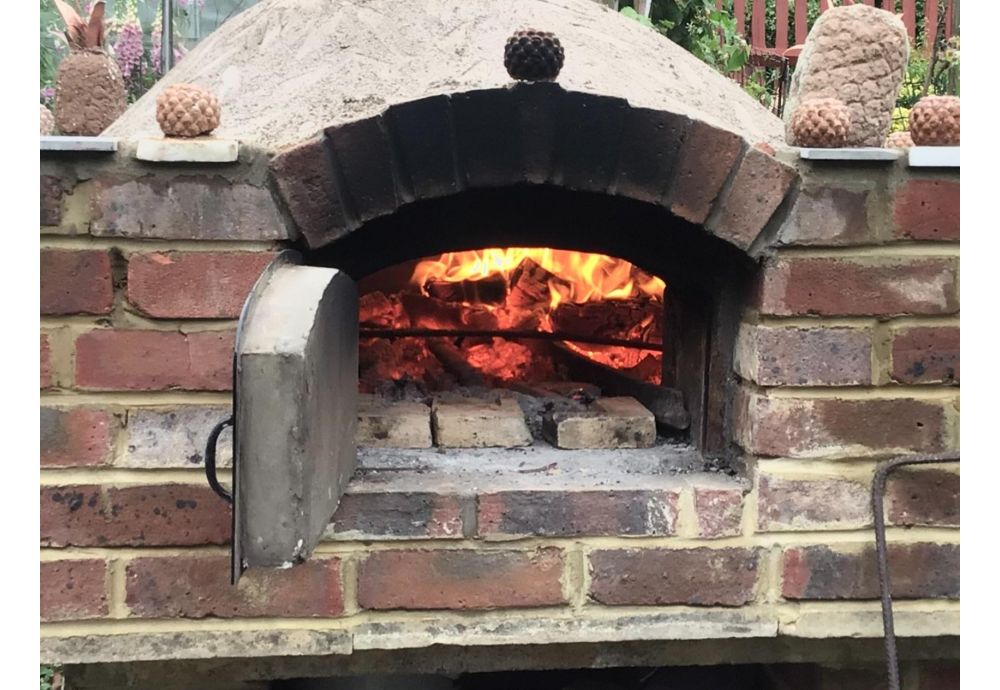
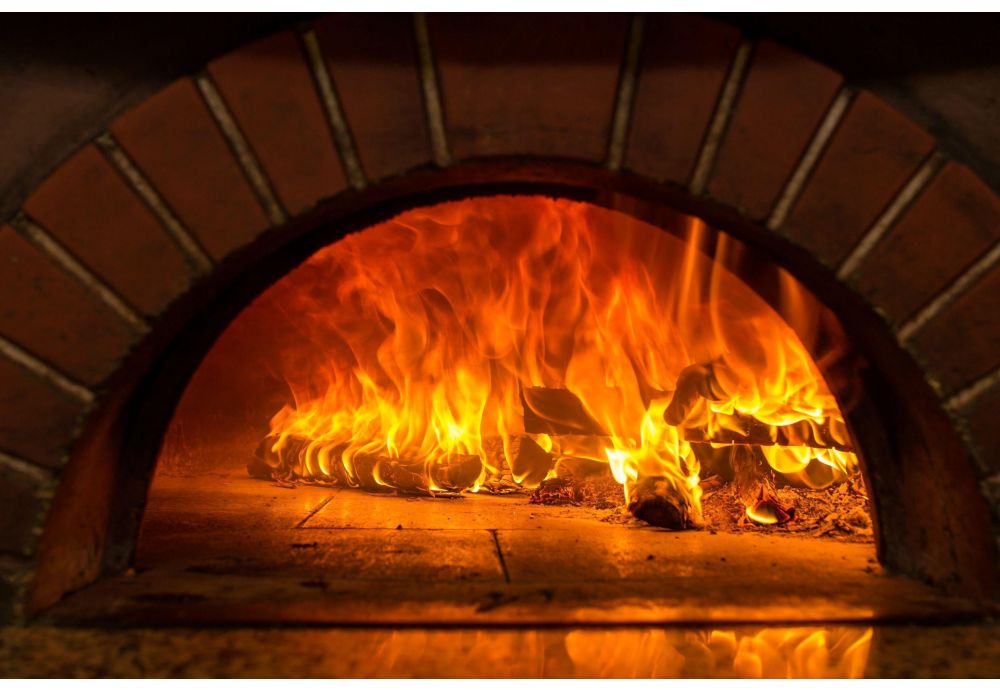
Light a small fire. The initial fire only requires some kindling and thin strips of seasoned wood. Keep the curing fire low, around 149ºC / 300ºF. You are going to build the fire in the middle of the internal dome wall.
When you build a fire, keep it central. You don’t have to build all your fires this way, you will figure it out as you go along, but when you are curing your oven, the fire needs to be in the centre.
All you need is two or three small fires over a few hours in order to dry it out thoroughly. You will know if you are doing it correctly when you see water running down the outside. It's really surprising how much water there is when the materials appeared to be quite dry at a casual glance!
Keep the fire going for 6 hours, or even longer if you can. You will keep adding the thin strips of wood to keep the fire going. Keep measuring the heat by measuring this from the dome, not the sides.
Day Two
Repeat the curing process but today your oven temperatures are going to be 177ºC / 350ºF. You will follow exactly the same process, keeping the fire going for at least six hours, measuring the temperature, and only using kindling and small strips of wood.
Day Three
Yes, we know you are dying to bake your own bread or add artichoke and mushrooms to your home baked pizza, but you only have a few more days to go. The moisture is slowly being dried out of the concrete and your oven is nearly ready for use.
Another six hour fire, a little bit hotter, until the temperature gauge reads 204ºC / 400ºF.
Day Four
The good thing about curing your oven is you can really work on your fires, and perfect them. This is your second to last day of curing and you are going to make a fire that is 232ºC / 450ºF.
Day Five- the last day of the curing process
One more fire sans food. Today you are going for another six hour fire and you are getting HOT at 260 degrees Celsius / 500 degrees Fahrenheit.
Once you have the curing out the way, you can start using your oven for food and it is honestly going to change your life, your family life and your way of entertaining.
A few notes:
Your DIY outdoor oven will have come with a thermometer which allows you to measure the heat. Measure the heat from the middle of the oven dome and always be extremely careful, following the directions.
Note too that when you are following your five day regimen of oven curing, it is better if your fires are LOWER in temperature than too hot. This is particularly pertinent for days two and three.
IMPORTANT NOTE: The temperature of the oven dome needs to be measured, not the side wall or the oven floor. This is where the temperature is highest in a wood fired oven. The temperature may vary slightly, but it is important not to exceed the temperature determined by the day's cure schedule by more than a few degrees. It is safer to be -7°C cooler instead of hotter, in particular on the first two days.
The wood and materials you use for the fire:
- You can only use hard firewood.
- Never use charcoal, chipped or laminated wood or sappy wood.
- Do not use pressure treated lumber.
- Firewood must be dry or medium.
- No liquid fuel should ever be used to start your fire or to maintain your fire.
- Never get firelighter fluids, gasoline / petrol, kerosene / paraffin, lantern oil or any similar liquids, anywhere close your fire.
If you are unsure how to start your fire, use an acetylene torch. Matches work just as well! Any food grade fire starters can be used, just remember to always be careful.
The directions of your DIY brick oven will cover the materials you use, and should come with the accessories needed, such as the analog temperature gauge / thermometer and starter kit.
If your DIY oven is gas operated, then you cannot use wood. If it is gas, curing your outdoor oven is a totally different process and you will follow your gas oven instructions.
What do you do if the fire is too hot?
First of all, don’t panic. When you are curing your oven and if your temperatures are too high, you need to let the fire burn slowly. Do not throw water over the fire as you will create a mess as well as cracking your floor tiles. You will also add unnecessary pressure to your oven.
Pizza ovens are designed for extreme heat. While you need to build your fires slowly, so you can get used to exactly how quickly and how hot they are going to burn, do not panic if you have made your fire too hot. Just let it burn out, slowly, and use it when the oven's air temperature is right.
You have cured your pizza oven, now what?
So you have built the most fabulous wood fired pizza oven, you have gone through the five day curing process, and now it is time to use the oven. Fantastic! You have good experience of lighting fires, after all you have been doing it for five days now.
However, before you get too excited and invite all your friends over for pizza, we suggest you practice using it a few times to save the embarrassment of lighting it up for the first time in front of guests only to fail to cook a single pizza.
When you practice, start off by putting your food in the centre of the dome. As you get more practice, you can cook a few things at the same time. Practice moving things around, positioning them, feeling how close you can place foods to the embers. Try out a whole host of different wood fired oven foods, checking how long a pizza takes, how long a loaf of bread takes, how long a casserole takes etc.
When you feel ready, start inviting your family and friends over. We promise, you are going to be the most popular chef in the neighbourhood. Wood fired oven meals are beyond delicious, fresh, tasty and inexpensive. You are going to save a lot of money on energy and electricity, that’s for sure.
More tips and tricks on how to use a wood fire pizza oven you will find on our blog.
Foods that can be cooked (apart from pizza):
- Focaccia
- Flatbreads
- Freshly baked bread
- Slow cooked meats
- Flaming steaks
- Baked potatoes
- Grilled vegetables
- Juicy roast chicken
- Baked or grilled fish
- Stews
- Casseroles
- Kebabs
- Shakshuka
We are hungry reading this and we are sure you are too. This oven will prove very versatile!
Accessories for a wood fired pizza oven
A wood fired pizza oven will come with some essentials, but other accessories you may need to buy additionally. A thermometer for an accurate temperature reading, grilling racks, pizza peels, cast iron skillets, smoking kits and casserole dishes are all going to be useful. Note that any casserole dishes you use are going to have to withstand very high temperatures so you might want to buy actual wood fired oven crockery.
Maintaining your wood fired pizza oven
You are going to be extremely precious about your clay oven when you build it, or have it built for you, and you are going to be extremely precious about it when you start using it.
We like this and think it is a great idea to start slowly. As you get more practiced, you will realise that your oven is extremely hardy and durable and can withstand a lot. You are going to open and close the door a lot, you are going to have tools in and out, you are sometimes going to have to drag dishes across the base of the dome. Your outdoor ovens can withstand a lot of traffic, although be quite careful with cast iron pots, at least until you are used to using them.
A quick recap:
You can have a pizza oven, wood fired or gas, built for you by professional contractors, or you can build your own fabulous oven with a DIY kit. These kits come with standard instructions and detail exactly what you need to do. You can buy oven kits online, or you can go to the store. Your choice! Follow the instructions carefully.
Once you have your fabulous oven all ready, it is not quite ready! It needs to be cured for five days. It is really important that you do the curing of wood fired ovens properly. You need to start off with a fire of low heat, gradually building up the heat. Light the fire every day, or evening, and keep it going for six hours a day. The idea is to start with low heat, building up to high heat, and slowly getting all the excess moisture out of the concrete.
Use pieces of wood that are approximately 300 mm long, although this depends on the size of your oven. Start off with kindling, gradually adding bigger pieces of wood.
Once you have cured your oven, you are good to go! Entertain, feed the family and have a fabulous time. The internet is a fantastic source for pizza oven recipes, and you can pretty much make anything you want in a hot oven, including delicious hot desserts.
Source your firewood and solid wood fuels from reputable suppliers, and in fact, everything you source for your wood burning oven, or gas burning oven, needs to be well sourced. Only buy a DIY kit from a good supplier and make quite sure the instructions come in your first language and they are clear and concise. Compare prices as there are a lot of DIY kits on the market, and if you are not great at DIY, get a professional builder or similar to come and do the job for you.
Building a pizza oven, without the curing part, should take a few days only, if you have all the materials and the weather is on your side, you can probably build a pizza oven over a weekend. Pizza ovens are not just wonderful to have, they save you tons of energy, they are sustainable and they are environmentally friendly. Plus, they are fabulous features to have and real entertainer’s delights.
Find the right spot for your brick oven, do all the research you need to do and don’t forget to cure your oven when you’re done with the building. Wood fired ovens will really change the way you prepare your food, the way you eat and the way you entertain.
Good luck and bon appetit!